Sitting Trott
[
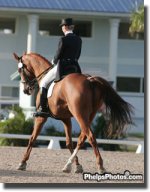
left]Dustane khubam inja matlabe khaili mohemi ra mikham bezaram tahte onvane SITTING TROT.Ghabele zekr hast ke SITTING TROT yeki az mohemtarin harekate varzesh savarkari hast chon dar nahveye cantering va Galop va ejraye tamami transition ha dakhil hast,,be avalin chizi ke dar nahveye savari ye savar kar tavajoh mishe nahveye SITTING TROTT hast va agar shoma ye savar kar hast bayad ghader bashid ta ouno bedune irad anjam bedid.
baraye khaili az savarkarhaye mobtadi in marhaleye moshkeli az savari mituneh bashe be khosus baraye asbhayi ke bakhlaghe kutah darand,man dar zir tozihati az chegunegie anjame nahveye doroste in harekat mizaram,omidvaram ke dustanam bekhunan va estefadeh konan.[/left]
The Ultimate Challenge
Beginners will often find the sitting trot an impossible task. More advanced riders who are now able to sit to the trot may remember how difficult it was in the beginning. Unfortunately, in an average lesson, instructors stress on including sessions of sitting trot, without any emphasis on how it can be achieved. This often leaves the horses with sore backs and the riders with sore bottoms!
If you adopt the classical seat, sitting in balance to the canter is far more possible than sitting to the trot without a little practice. Simply taking your stirrups away, as instructors often do, will not magically glue you to the saddle. It takes conscious effort to enable the body to absorb the bouncy up and down movement.
So how is it possible?
The bad news is that there is no formula that will instantly hold you to the saddle. The good news is that, following certain exercises and in a period of time, anyone can do it!
Sitting to the trot relies on the basics of the classical seat. If you have not reviewed the The Back And The Pelvis section, now is the time to do it. Sitting to the trot is all about suppleness in the back and pelvis. The human body is highly flexible. It is what we do in our daily lives that either improves our suppleness or lessen the flexibility of our muscles. People who have to do physically demanding work are much more flexible than others who are less involved in physical work. It may not be necessary to be supple in our bodies to carry on living, but it is absolutely essential if we were to make true horsemen and horsewomen.
Before we attempt to sit to the trot, we must be sure to have considered the following three points:
Full understanding of the classical seat, particularly the function of the back and the pelvis.
That you have earned a certain degree of flexibility in your muscles on the ground.
That you understand the motion of the horse in the trot.
Preparation
To be somewhat supple in the back and pelvis is preferable before you attempt the sitting trot as this will aid in a smooth ride. You can, of course, supple your back and pelvis through practice of the sitting trot, although that could mean sore backs and bottoms for quite a while. To avoid a rough start, try a few exercises on the ground before beginning your sitting trot exercises. Aerobic classes are excellent for suppling and strengthening all body muscles.
Remember that preparation is always helpful. It would be worthwhile if you take a few aerobic lessons or bring home a video to stretch and supple up your muscles. Sky divers, for instance, don't attempt a free jump from the airplane before they have prepared and practiced enough on the safety of the ground. Riders are athletes, they need to keep fit in order to perform properly, so get in shape!
On The Lunge
Lunge lessons can work miracles on improving your sitting trot. However, a lunge lesson can be strenuous, exhausting, and not objective if the correct exercises are not carried out. As a general rule, we usually don't extend a lunging session to over 20 minutes when we lunge the horse alone, but somehow the session extends to 30 minutes when we add a rider to the horse! If you ask for a lunge lesson at any riding school, it would normally last for 30 minutes. If we know that lunging a horse for more than 20 minutes will exhaust him, then why do we give lunge lessons for 30 minutes?
The point is that the horse cannot perform if he is pushed beyond his limits. If the horse is tired, he will not give the rider the proper FEEL. Why do we lunge riders anyway? The answer is: to give the rider something else to think about besides controlling the horse. If the rider begins to focus on the horse, the whole objective of the lunge lesson is lost.
However, a lunging session can extend to beyond 20 minutes, provided that you give the horse frequent breaks off the lunge. If you were to jog in circles for 15 minutes, how would you feel? Chances are, you would get drowsy and loose your balance within the first 5 minutes. Horses are stronger than humans, of course, but it would be nice if they were given breaks to regain their balance and refresh their minds.
Benefits Of The Lunge
Since the rider's attention is taken off control of the horse, he/she can now concentrate on developing a feel for the trot. Generally, the benefits of riding on the lunge are as follows:-
Understanding the motion of the horse, which..
Develops a FEEL for the trot, which leads to..
A stronger and deeper seat, that enables you to..
Influence the horse through the most subtle of aids.
Word Of Caution!
True influence over the horse cannot be gained through rising trot. One cannot attempt a half pass in rising trot since the seat aids contribute much to the aids of the half pass. Similarly, if you are able to achieve some collection while in rising trot, beware that you are likely to have been harsh with the reins.
Exercises On The Lunge
So you are now on the horse, ready to be lunged, but what do you do on the lunge? A lunging session can pass by without reaching any goal if the correct exercises are ignored. Here are some exercise tips that will help you gain a feel for the trot while suppling your muscles.
1. Shoulders behind the perpendicular
Stage I: Cross your stirrups over the horse's withers and let go of the reins, leaving the subject of control to the person lunging the horse. Make sure that the reins are not slack - tie them in a knot at the withers. While still in walk, align your body in accordance with the classical seat. You may realize that it would be difficult to let the gravity flow through your heels (heel lower than the toes) while still relaxing your thigh and calf muscles. The reason behind this is as follows: when your foot rests in the stirrup, the weight of your leg is supported on the stirrup. Relate this to when you're sitting in a chair with your feet on a foot rest. Remove the foot rest, but keep your legs in their position. The leg muscles, and even the stomach muscles, will flex in order to support the weight of the legs. With the stirrup away, the muscles will tense and contract to support the position you want to achieve. At this point, do not worry about tensing your legs too much as long as you sit deeply with your legs down and far apart. Now, we come to think of the hands. With your outside hand, hold the pommel of the saddle (the front part of the saddle), and rest your inside hand on your thigh. The outside hand will hold you to the saddle during the trot, while the inside hand will aid in maintaining your balance. Time to get into action!
As the horse steps into trot, exert a conscious effort not to let your body move out of alignment. Tell the person lunging to keep the horse in a slow collected trot. Only pull yourself into the saddle with your outside hand as much as you need to prevent yourself from bouncing. Relax your inside arm, and keep your hand resting on your thigh. The outside hand will have a tendency to pull you forward in the saddle, the position of the outside hand on your thigh will help keep your shoulders square and your back straight, therefore preventing your seat from collapsing. Your legs may even tense up more during the trot as you grip with your thighs to keep in balance. Beware that gripping will move the legs out of coordination with your body, which will reflect on weakening your seat and will make your task even harder. Do try to relax as much as you can.
Now, slowly lean back a few degrees (approximately 20 degrees). Do not bend your spine drop your shoulder. Rotate from your pelvis. As you lean backward, keep in mind that your legs must not move. Leaning back may cause a reverse action from your legs - letting them slide forward; try not to let that happen. Rotating your pelvis backwards burrows your seat bones deeper in the saddle. This action is often used to encourage the horse to extend his stride, but it will not cause such a reaction since someone else is already controlling the horse. Hold this position for about 10 seconds before slowly returning to the upright position. Do not count! Estimate the time in your mind. Your mind has to be clear and simply focused on the exercise.
So what should you expect? When you lean back, your seat bones are brought as closely against the horse as possible. Your outside hand is making sure you stay glued to the saddle. The effect will be the absorption of the horse's motion in the pelvis, causing it to rock slightly. This is an exaggerated effect caused by the tilt in the pelvis which will be reduced when you are sitting upright. Repeat the exercise, holding the position longer with every repetition. Breathe deeply, stay calm, look at the beautiful sky and know that you are enjoying the ride. Keeping a relaxed frame of mind combats any fears hidden deep inside, so, again, enjoy the ride, and be happy!
The main purpose of this exercise is that it teaches the rider the feel of the trot. It also supples the back and stomach muscles, leading to a more flexible pelvis. The effort you will exert trying to hold your position will eventually decline as your body becomes stronger and your seat more independent.
Stage II: Look! No hands!
When you feel you have mastered the previous exercise, then it's time to move on to the more advanced form of it. On average, it will probably take you around 10 to 15 30-minute lunging lessons. Keep your lunge lessons at least one or two days apart to allow your muscles time to recover. Try taking 3 lunge lessons in 3 consecutive days; your muscles will surely complain!
To begin the exercise, cross your stirrups and tie the reins as mentioned in Stage I. Now, carry your arms as though you were holding the reins, i.e. upper arms by your sides and forearms parallel to the ground. There will be no holding on to the pommel this time, but do not worry, your body will naturally absorb most of the impact. From walk, tell the lunge person to gently urge the horse into trot. Relax into the transition. Believe it or not, you are now physically capable of sitting to the trot! But how can such an assumption be made? Answer: As the horse takes his first two strides into trot, you will remain still and deep in the saddle, because you have relaxed your muscles during the walk. If you begin to bounce again after the first few strides, be aware that some of your muscles have tensed in anticipation. But that's okay, don't panic if you feel a little off balance. Close your eyes and concentrate on obtaining a secure and independent seat to the trot. You will know, from the Stage I exercise, the feel of the sitting trot, therefore, when you sense that feeling this time, try to hang on to it.
Easier said than done.
Here is what you should do. Before you trot, secure your position according to the classical seat while pretending that you are holding the reins. While in trot, keep your body still and do not allow it to move out of alignment. Imagine that your lower body has become part of the horse. Allow your pelvis and lower back to spring slightly to absorb the up and down movement. Knowing that your back and pelvis must be allowed to relax will prevent your body from becoming too stiff and rigid. Be aware that you are now riding totally independent or stirrups and reins and you should be proud that you have achieved a secure seat.
To help prevent from stiffness, continue to breathe normally, relax your shoulders, and keep your eyes closed. Eliminate all outside distractions and focus all your attention on your waist, pelvis, and lower back area. Remember that your upper body must remain upright - relax does not mean collapse!
You now have a chance to study the horse's motion in trot. Try to visualize, with your eyes closed, which leg hits the ground, and which leg leaves the ground. When a hoof leaves the ground, the horse's back is lowered, and when it hits the ground, the horse's back is raised, which results in the all-so-favored up and down movement. Understanding the horse's motion aids in securing a balanced seat, which is the whole objective of the sitting trot.
After you spend a few moments refining your seat in the manner described above, it is time to bring your shoulders behind the perpendicular. Do not attempt this exercise until you feel that you are in balance with the horse, otherwise you will grip and bounce and get uncomfortable. Slowly rotate from your pelvis, exactly as mentioned in Stage I. Follow the instructions in Stage I, while pretending that your are still holding the reins.
There is an added benefit to this exercise over the benefits of Stage I. Riding without stirrups and reins strengthens your seat and teaches your proper balance without depending on anything but your own strength and suppleness.
2. Riding Bareback
True feeling to the trot cannot be obtained in a saddle. You will not be able to feel the motion of the horse and train your body to sit tall and still, while discreetly absorbing his motion, if you have not entirely experienced the trot bareback.
Start off by taking away the saddle completely. Tie a neck strap, which could be a part of an old martingale, around the horse's neck, and use a block to help you mount the horse. It will feel a little slippery at first, but you will soon grow accustomed to it. Remember that you are still on the lunge!
The classical seat still applies to bareback riding. Align your body as though you were sitting in a saddle while still in halt, and maintain your position as the horse begins to walk. The neck strap will be used for security. I would recommend tying the reins as you did in the previous exercises since you will be holding on to the neck strap. Your body will have gained a fair degree of suppleness, so once your horse begins to trot, you will not be facing much difficulty. However, only trot a few strides at a time. Follow this pattern: Trot 4 or 5 strides, walk half a circle, trot 5 or 6 strides, walk quarter a circle, and so on. The walk interruptions help you relax and stay in the proper position, while allowing your body adjust after any disturbance the trot might have caused.
Do not pressure yourself. Sitting to the trot without a saddle is not an easy task, but it is extremely helpful in strengthening and suppling your body. It will do wonders to your riding skills, and you will notice that you are able to control your horse with minimal aids since your seat is confident and secure. Eventually, you will be able to sit bareback at the trot and even at the canter.
Allow yourself plenty of time to learn to sit to the trot. It won't happen overnight. Anything that's right is time consuming, and anything that's rushed is not good quality. Remember that a good seat is the essence of true horsemanship.

